Authorization in REST vs Postgraphile
January 20, 2021
Postgraphile is a great tool for making instant GraphQL from a PostgreSQL database. When I started working with Postgraphile, its authorization part felt a bit different compared to the REST based backends which I had worked with before. Here I will share some differences that I noted.
First, let's see Authentication vs Authorization.
Authentication is determining whether a user is logged in or not. Authorization is then deciding what the users has permission to do or see.
Comparing the implementation of a blog application using Postgraphile vs REST
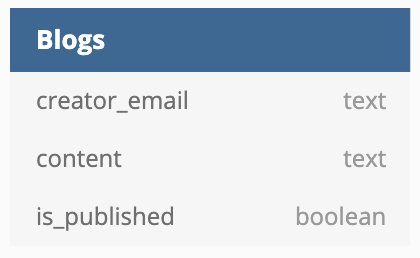
Suppose we have to build a blog application with the below schema.

Features of the blog application.
-
Display published blogs with is_published = true to all users.
-
Display unpublished blogs with is_published = false to its creator only.
REST Implementation
The REST implementation with JavaScript and sequelize can be like below.

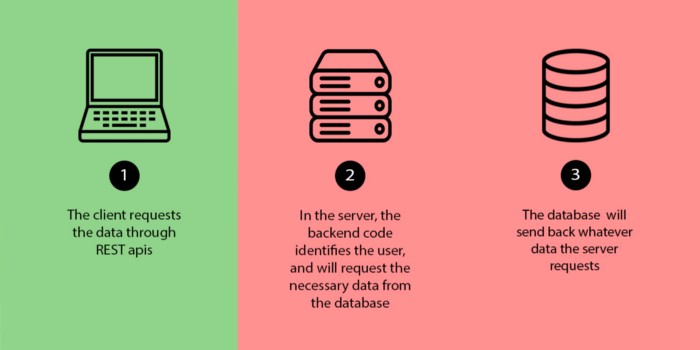
The client requests the blogs using an endpoint, it also attaches the access token received from the authentication service.
const getBlogs = () =>
  requestData({
    endpoint: `/api/blogs`,
    accessToken: "***",
  });
The backend code in the server receives the request, finds the current logged in user from the access token, and requests the data based on the current logged in user from the database.
const userEmail = findEmail(accessToken);
const blogs = await models.Blogs.findAll({
  where: { [Op.or]: [{ creatorEmail: userEmail }, { isPublished: true }] },
});

res.send(blogs);
Here, the backend code finds the user’s email from the access token, then requests the database to give the list of blogs that have creatorEmail matching to the current user's email or the field isPublished is true.
The database will return whatever data the server requests.
Similarly, for creating, editing, and deleting blogs, we can have different end-points to handle the authorization logic in the backend code.
Postgraphile Implementation
The postgraphile implementation can be like below.

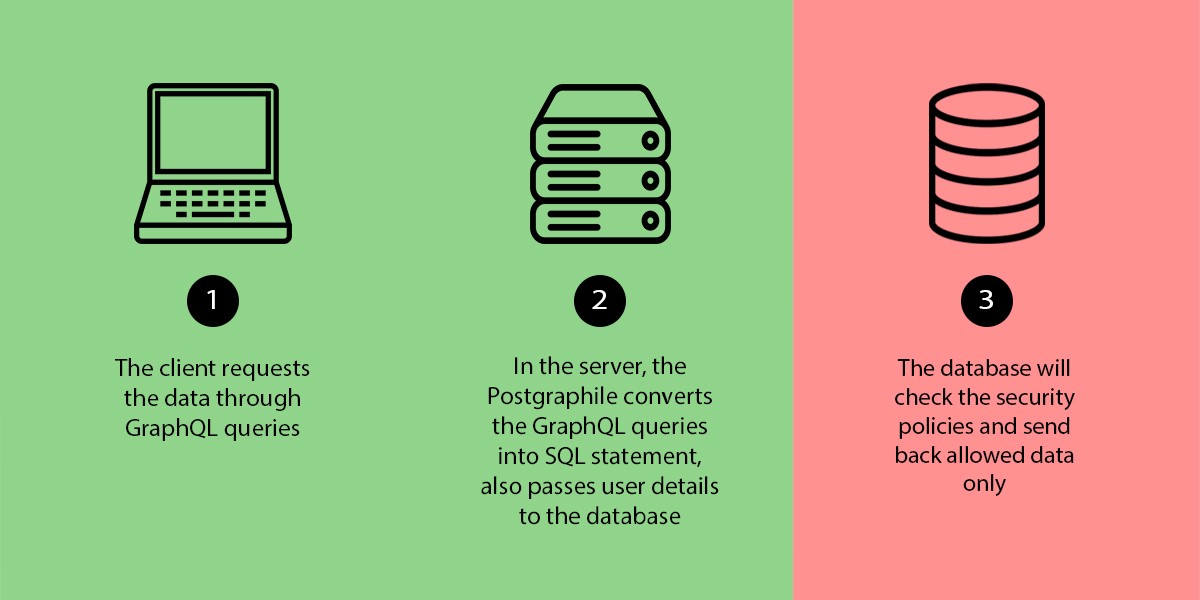
The client requests the blogs using a GraphQL query. It also attaches the access token received from the authentication service.
const data = requestQuery({
 query: "allBlogs {
         nodes {
            content
            creatorEmail
            visiblityType
           }
        }"
 accessToken: '***'
})
In the server, we configure Postgraphile to pass the user information to the database.
export postgraphile(DATABASE_URL, schemaName, {
  pgSettings: (req) => {
     const userEmail = findEmail(accessToken);
     return({
         'current_user_email': userEmail
     })
  }
})
We can pass a function as Postgraphile’s pg Settings property, whose return value will be accessible from the connected Postgres database by calling the current_setting function.
In the database, the row-level security policies can be defined to control the data access.
Row-level security policies are basically just SQL that either evaluates to true or false. If a policy is created and enabled for a table, that policy will be checked before doing an operation on the table.
create policy blogs_policy_select
on public.blogs for select to users
USING (
 isPublished OR
 creator_email = current_setting('current_user_email')
);
ALTER TABLE blogs ENABLE ROW LEVEL SECURITY;
Here the policy named blogs_policy_select will be checked before selecting a row in the table public.blogs. A row will be selected only if the isPublished field is true or creator_email matches with the current user's email.
Similarly, for creating, editing, and deleting blogs, we can have row level security policies for INSERT, UPDATE, and DELETE operations on the table.
Conclusion
The REST implementation does the authorization on the server level but the Postgraphile does it on the database level. Each implementation has its own advantages and disadvantages, which is a topic for another day.
Follow @bigbinary on X. Check out our full blog archive.