Cache all files with Cloudflare worker and HMAC auth
January 29, 2019
Cloudflare is a Content Delivery Network (CDN) company that provides various network and security services. In March 2018, they released "Cloudflare Workers" feature for public. Cloudflare Workers allow us to write JavaScript code and run them in Cloudflare edges. This is helpful when we want to pre-process requests before forwarding them to the origin. In this post, we will explain how we implemented HMAC authentication while caching all files in Cloudflare edges.
We have a bunch of files hosted in S3 which are served through CloudFront. To
reduce the CloudFront bandwidth cost and to make use of a global CDN (we use
Price Class 100 in CloudFront), we decided to use Cloudflare for file
downloads. This would help us cache files in Cloudflare edges and will
eventually reduce the bandwidth costs at origin (CloudFront). But to do this, we
had to solve a few problems.
We had been signing CloudFront download URLs to restrict their usage after a period of time. This means the file download URLs are always unique. Since Cloudflare caches files based on URLs, caching will not work when the URLs are signed. We had to remove the URL signing to get it working with Cloudflare, but we can't allow people to continuously use the same download URL. Cloudflare Workers helped us with this.
We negotiated a deal with Cloudflare and upgraded the subscription to Enterprise plan. Enterprise plan helps us define a Custom Cache Key using which we can configure Cloudflare to cache based on user defined key. Enterprise plan also increased cache file size limits. We wrote following Worker code which configures a custom cache key and authenticates URLs using HMAC.
Cloudflare worker starts with attaching a method to "fetch" event.
addEventListener("fetch", event => {
  event.respondWith(verifyAndCache(event.request));
});
verifyAndCache function can be defined as follows.
async function verifyAndCache(request) {
  /**
  source:

  https://jameshfisher.com/2017/10/31/web-cryptography-api-hmac.html
  https://github.com/diafygi/webcrypto-amples#hmac-verify
  https://stackoverflow.com/questions/17191945/conversion-between-utf-8-arraybuffer-and-string
  **/

  // Convert the string to array of its ASCII values
  function str2ab(str) {
    let uintArray = new Uint8Array(
      str.split("").map(function (char) {
        return char.charCodeAt(0);
      })
    );
    return uintArray;
  }

  // Retrieve to token from query string which is in the format "<time>-<auth_code>"
  function getFullToken(url, query_string_key) {
    let full_token = url.split(query_string_key)[1];
    return full_token;
  }

  // Fetch the authentication code from token
  function getAuthCode(full_token) {
    let token = full_token.split("-");
    return token[1].split("/")[0];
  }

  // Fetch timestamp from token
  function getExpiryTimestamp(full_token) {
    let timestamp = full_token.split("-");
    return timestamp[0];
  }

  // Fetch file path from URL
  function getFilePath(url) {
    let url_obj = new URL(url);
    return decodeURI(url_obj.pathname);
  }

  const full_token = getFullToken(request.url, "&verify=");
  const token = getAuthCode(full_token);
  const str =
    getFilePath(encodeURI(request.url)) + "/" + getExpiryTimestamp(full_token);
  const secret = "< HMAC KEY >";

  // Generate the SHA-256 hash from the secret string
  let key = await crypto.subtle.importKey(
    "raw",
    str2ab(secret),
    { name: "HMAC", hash: { name: "SHA-256" } },
    false,
    ["sign", "verify"]
  );

  // Sign the "str" with the key generated previously
  let sig = await crypto.subtle.sign({ name: "HMAC" }, key, str2ab(str));

  // convert the Arraybuffer "sig" in string and then, in Base64 digest, and then URLencode it
  let verif = encodeURIComponent(
    btoa(String.fromCharCode.apply(null, new Uint8Array(sig)))
  );

  // Get time in Unix epoch
  let time = Math.floor(Date.now() / 1000);

  if (time > getExpiryTimestamp(full_token) || verif != token) {
    // Render error response
    const init = {
      status: 403,
    };
    const modifiedResponse = new Response(`Invalid token`, init);
    return modifiedResponse;
  } else {
    let url = new URL(request.url);

    // Generate a cache key from URL excluding the unique query string
    let cache_key = url.host + url.pathname;

    let headers = new Headers(request.headers);

    /**
    Set an optional header/auth token for additional security in origin.
    For example, using AWS Web Application Firewall (WAF), it is possible to create a filter
    that allows requests only with a custom header to pass through CloudFront distribution.
    **/
    headers.set("X-Auth-token", "< Optional Auth Token >");

    /**
    Fetch the file using cache_key. File will be served from cache if it's already there,
    or it will send the request to origin. Please note 'cacheKey' is available only in
    Enterprise plan.
    **/

    const response = await fetch(request, {
      cf: { cacheKey: cache_key },
      headers: headers,
    });
    return response;
  }
}
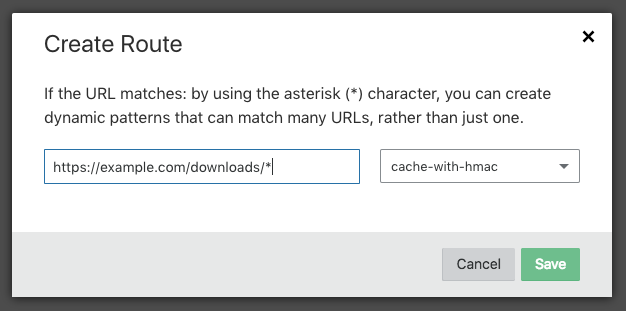
Once the worker is added, configure an associated route in
"Workers -> Routes -> Add Route" in Cloudflare.

Now, all requests will go through the configured Cloudflare worker. Each request will be verified using HMAC authentication and all files will be cached in Cloudflare edges. This would reduce bandwidth costs at the origin.
Follow @bigbinary on X. Check out our full blog archive.