How to test React Native App on a real iPhone
August 25, 2015
I have been developing a new iOS app using React Native. I have been testing it using simulator provided by Xcode. Now it's time to test the app using a real device. One could ask why test on a real device if it works perfectly on a simulator. Here are some of the reasons.
- There are a number of device specific features which are not testable on a simulator. Phone calls, camera, gps data, compass and vibration are a few of them.
- Testing unexpected cases that can only be tested on a real device. Like how your application handles incoming calls, low memory situations, low disk space, limited data connectivity etc.
- Hardware-wise, your device is different than your Mac. If your app is graphics intensive and requires a lot of CPU usage, it might work seamlessly on your simulator depending on your Mac's specifications. But it might be laggy and glitchy on the real device.
Now let's look into how you can start testing your React Native app on an real iPhone.
Step 1 - Plug in your device
Plug in your device to your Mac and open Xcode. You will be able to select your device to the right of the Play and Stop buttons.

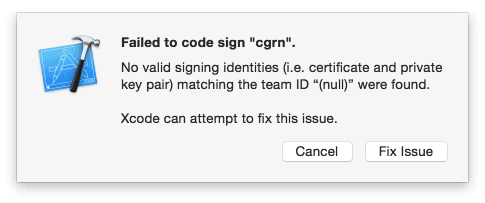
You might run into one of the following two errors if you have not enrolled into Apple's Developer Program.
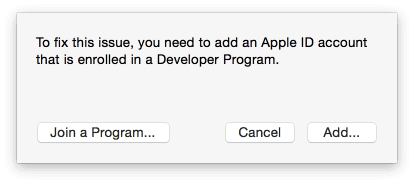
Error 1 : Failed to code sign


To fix above issues please enroll in Apple Developer program.
Error 2 : Disk Image could not be mounted
The Developer Disk Image could not be mounted :
You may be running a version of iOS that is not supported by this version of XCode

This can happen if your iOS version is not supported by your current version of Xcode. To fix this, just update your Xcode to the latest version from the App Store.
Step 2 - Set right deployment target
In your Xcode project setup the Deployment Target should be set to less than
or equal to the iOS version installed on the device.
If your iPhone is running iOS 7.0 and you have set "Deployment Target" as 8.0 then the app will not work. If your iPhone is running iOS 8.0 and you have set "Deployment Target" as 7.0 then the app will work.

Step 3 - Fix "Could not connect to development server" error
So the app is installed and you can see the launch screen. That's great. But soon you might get following error on your iPhone.
Could not connect to development server.
Ensure node server is running and available on the same
network – run ‘npm start’ from react-native root.
To fix this open AppDelegate.m file in your project's iOS folder.
Locate line mentioned below and replace localhost with your Mac IP address
e.g. 192.168.x.x.
To find the ip address of your Mac this is what ReactNative suggests us to do.
you can get ip by typing
ifconfiginto the terminal and selecting the * >inetvalue underen0:.
jsCodeLocation = [NSURL URLWithString:@"http://localhost:8081/index.ios.bundle"];
Save and click run again. This will fix the error.
Step 3 - Fix connecting to API hosted on local development server
Now the app is installed and you can navigate through the app screens. If the app attempts to make API call to the server running locally on the machine then depending on how the local server was started it could be a problem.
In my case, I have a Ruby on Rails application running on my local machine. I
had started my rails server by executing command rails server.
To do this, the app should be able to access the rails server using the private
ip of the server e.g. 192.168.x.x:3000. Turned out that I had started my rails
server using command rails server.
Because of
change in Rails 4.2
rails server listens to localhost and not 0.0.0.0.
The rails guide further says following.
with this change you will no longer be able to access the Rails server from a different machine, for example if your development environment is in a virtual machine and you would like to access it from the host machine. In such cases, please start the server with rails server -b 0.0.0.0 to restore the old behavior.
In this case iPhone is trying to talk to Rails server so Rails server must be started using following command.
rails server -b 0.0.0.0
or
rails server --binding=0.0.0.0
By doing so, now you can connect to your Rails app from your local network, by
browsing to http://192.168.x.x:3000.
Summary
These were some of the issues I came across while testing my iOS app on an actual device and how I fixed them. Hopefully, this blog post helps you fix these error cases get you started on testing quickly.
Follow @bigbinary on X. Check out our full blog archive.