Requesting camera and microphone permission in an Electron app
December 3, 2024
Recently, we built NeetoRecord, a loom alternative. The desktop application was built using Electron. In a series of blogs, we capture how we built the desktop application and the challenges we ran into. This blog is part 7 of the blog series. You can also read about part 1, part 2, part 3, part 4, part 5, part 6 part 8 and part 9 .
When developing an Electron app, handling permissions for the camera and microphone varies from platform to platform. On macOS, apps are denied access to the camera and microphone by default. To gain access, we must explicitly request these permissions from the user. On the other hand, Windows tends to grant these permissions to apps by default, although users can manually revoke them through the system settings.
Updating entitlement file for Mac
In macOS, applications are run with a limited set of permissions to limit potential damage from malicious code. Depending on which Electron APIs our app uses, we may need to add additional entitlements to our app's entitlements file.
In macOS applications, entitlements or permissions are specified using a file
with a format like property list (.plist) or XML.
<?xml version="1.0" encoding="UTF-8"?>
<!DOCTYPE plist PUBLIC "-//Apple//DTD PLIST 1.0//EN" "http://www.apple.com/DTDs/PropertyList-1.0.dtd">
<plist version="1.0">
  <dict>
    <key>com.apple.security.cs.allow-unsigned-executable-memory</key>
    <true/>
    <key>com.apple.security.cs.allow-jit</key>
    <true/>
    <key>com.apple.security.device.camera</key>
    <true/>
    <key>com.apple.security.device.microphone</key>
    <true/>
    <key>com.apple.security.device.audio-input</key>
    <true/>
    <key>com.apple.security.cs.allow-dyld-environment-variables</key>
    <true/>
  </dict>
</plist>
For our purpose, we need com.apple.security.device.camera for the camera and
com.apple.security.device.microphone and
com.apple.security.device.audio-input entitlements for the microphone.
Configuring in electron-builder
electron-builder is a popular alternative package for building, packaging and distributing Electron applications.
We need to ensure that the path to entitlements.plist is correctly set in the
electron-builder configuration.
 "build": {
    "productName": "AppName",
    "appId": "com.neeto.AppName",
     "mac": {
      "target": {
        "target": "default",
        "arch": [
          "arm64",
          "x64"
        ]
      },
      "type": "distribution",
      "entitlements": "assets/entitlements.mac.plist",
    },
 }
We also need to provide a description of the camera and microphone's usage in
the Info.plist. We don't have to create an Info.plist when using
electron-builder; it will create and handle it internally, and any additional
info can be passed using the extendInfo key.
 "build": {
    "productName": "AppName",
    "appId": "com.neeto.AppName",
     "mac": {
      "target": {
        "target": "default",
        "arch": [
          "arm64",
          "x64"
        ]
      },
      "type": "distribution",
      "entitlements": "assets/entitlements.mac.plist",
      "entitlementsInherit": "assets/entitlements.mac.plist",
      "extendInfo": {
        "NSMicrophoneUsageDescription": "Please give us access to your microphone",
        "NSCameraUsageDescription": "Please give us access to your camera",
      },
    },
 }
The above code will add NSMicrophoneUsageDescription and
NSCameraUsageDescription to the Info.plist.
Requesting permission
Electron's systemPreferences module exposes events and methods to access and alter system preferences.
Before requesting permission, we can use the
systemPreferences.getMediaAccessStatus method to check if we already have the
access.
import { systemPreferences } from "electron";

const hasMicrophonePermission =
  systemPreferences.getMediaAccessStatus("microphone") === "granted";
const hasCameraPermission =
  systemPreferences.getMediaAccessStatus("camera") === "granted";
For the camera and microphone, if permission is granted, it will return
granted; otherwise, depending on the platform and permission settings, it will
return not-determined, denied, restricted or unknown.
For Mac, we can use the systemPreferences.askForMediaAccess method to
request permission. This method will return a promise that resolves with true
if consent was granted and false if it was denied.
const cameraGranted = await systemPreferences.askForMediaAccess("camera");
const microPhoneGranted = await systemPreferences.askForMediaAccess(
  "microphone"
);
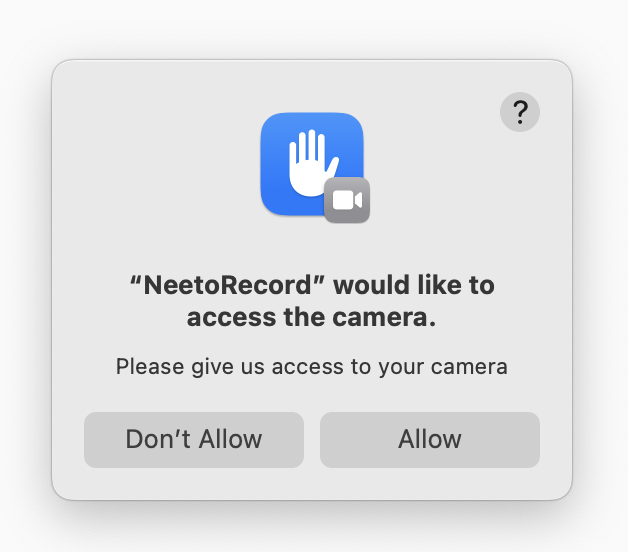
When we call this method, it will open a system alert asking the user to grant permission.

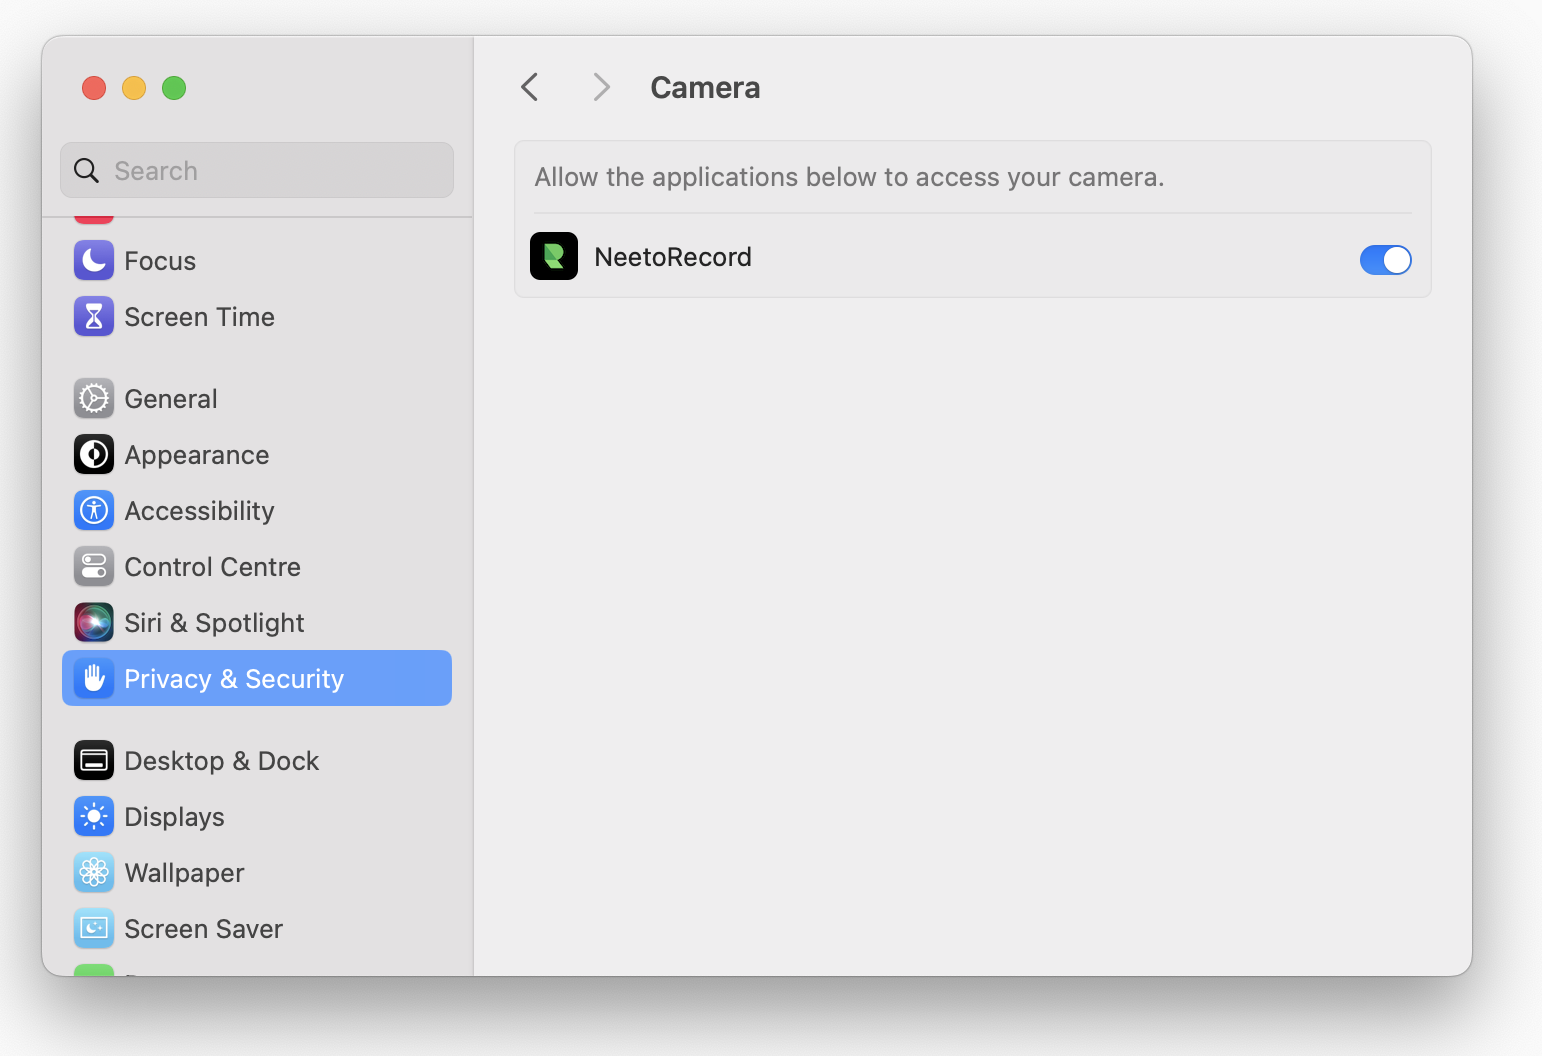
If the user denies the permission the very first time, this method call will not open the system alert again. Now, we have to open the system preference pane and ask the user to enable it from there.
import { shell } from "electron";

const cameraGranted = await systemPreferences.askForMediaAccess("camera");
if (!cameraGranted) {
  shell.openExternal(
    "x-apple.systempreferences:com.apple.preference.security?Privacy_Camera"
  );
}

const microPhoneGranted = await systemPreferences.askForMediaAccess(
  "microphone"
);
if (!microPhoneGranted) {
  shell.openExternal(
    "x-apple.systempreferences:com.apple.preference.security?Privacy_Microphone"
  );
}
To open the preference pane, we can use the
shell module.
shell.openExternal can be used to call any external protocol URL.
Here we are opening System preference(x-apple.systempreferences) ->
Privacy & Security(com.apple.preference.security) -> Camera(Privacy_Camera)
or Microphone(Privacy_Microphone).

Since we asked the user to open the preference pane because the user initially denied permission if they chose to enable it this time, we should ask them to relaunch the application. Only then will the updated permission settings take effect.
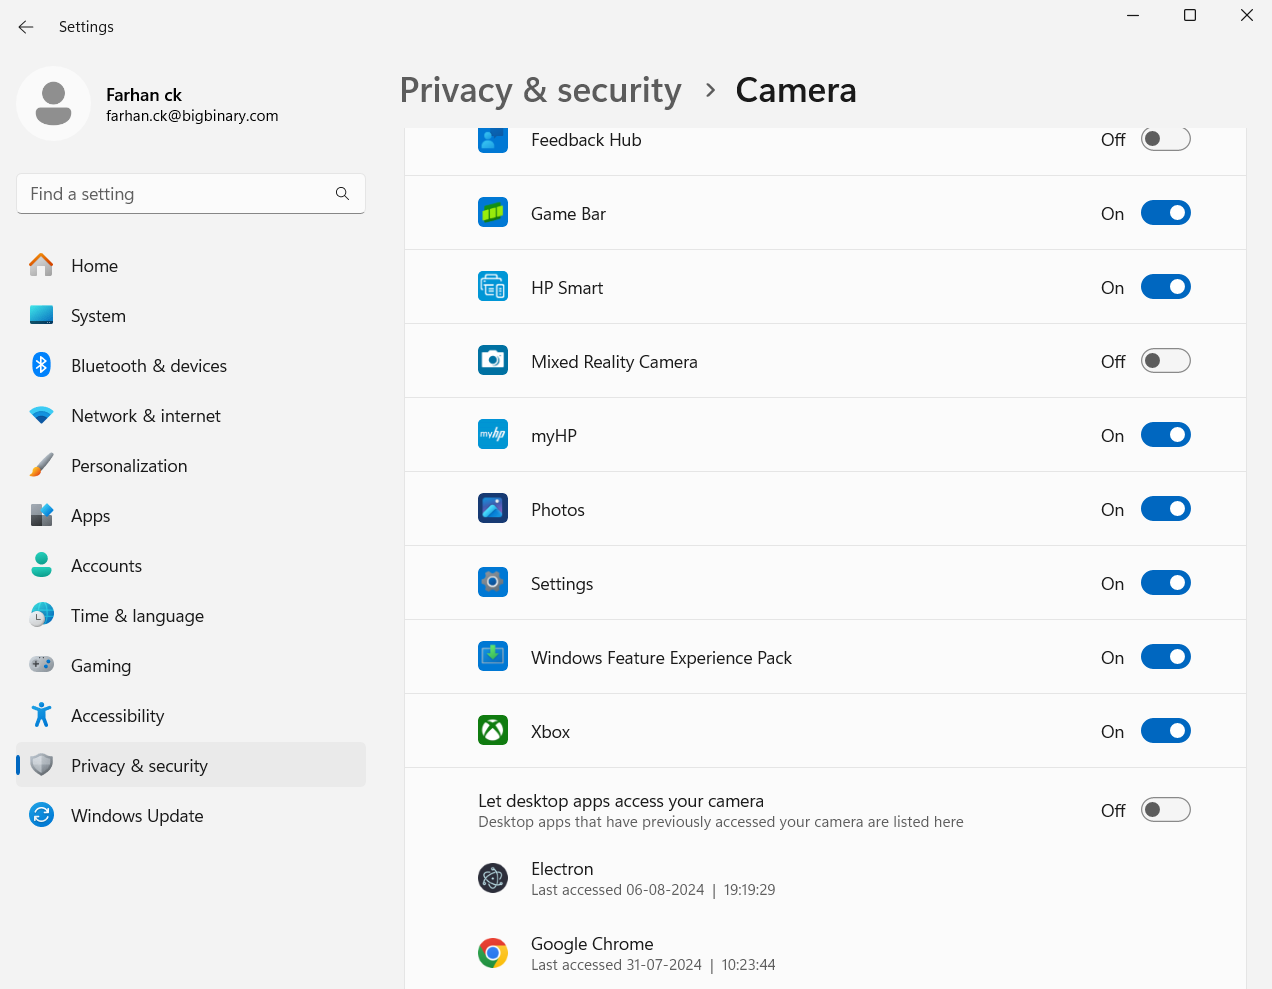
Windows has global settings for controlling the camera and microphone. The good thing is that it is enabled by default. But in case the user explicitly disables it, one thing we can do is open the privacy settings page of the camera and microphone and ask the user to re-enable it.
const hasMicrophonePermission =
  systemPreferences.getMediaAccessStatus("microphone") === "granted";
if (!hasMicrophonePermission) {
  shell.openExternal("ms-settings:privacy-microphone");
}

const hasCameraPermission =
  systemPreferences.getMediaAccessStatus("camera") === "granted";
if (!hasCameraPermission) {
  shell.openExternal("ms-settings:privacy-webcam");
}

Just like we did for Mac, we use the shell.openExternal method to open the
Setting(ms-settings) -> Privacy -> Camera(privacy-webcam) or
Microphone(privacy-microphone).
And we are done! Here is everything put together.
const checkMicrophonePermission = async () => {
  const hasMicrophonePermission =
    systemPreferences.getMediaAccessStatus("microphone") === "granted";
  if (hasMicrophonePermission) return;
  if (process.platform === "darwin") {
    const microPhoneGranted = await systemPreferences.askForMediaAccess(
      "microphone"
    );
    if (!microPhoneGranted) {
      shell.openExternal(
        "x-apple.systempreferences:com.apple.preference.security?Privacy_Microphone"
      );
    }
  } else if (process.platform === "win32") {
    shell.openExternal("ms-settings:privacy-microphone");
  }
};

const checkCameraPermission = async () => {
  const hasCameraPermission =
    systemPreferences.getMediaAccessStatus("camera") === "granted";
  if (hasCameraPermission) return;
  if (process.platform === "darwin") {
    const cameraGranted = await systemPreferences.askForMediaAccess("camera");
    if (!cameraGranted) {
      shell.openExternal(
        "x-apple.systempreferences:com.apple.preference.security?Privacy_Camera"
      );
    }
  } else if (process.platform === "win32") {
    shell.openExternal("ms-settings:privacy-webcam");
  }
};
Follow @bigbinary on X. Check out our full blog archive.