Uploading file in an isomorphic ReactJS app
August 28, 2017
Design of an isomorphic App
In a typical single-page application (SPA) server sends JSON data. Browser receives that JSON data and builds HTML.
In an isomorphic app, the server sends a fully-formed HTML to the browser. This is typically done for SEO, performance and code maintainability.
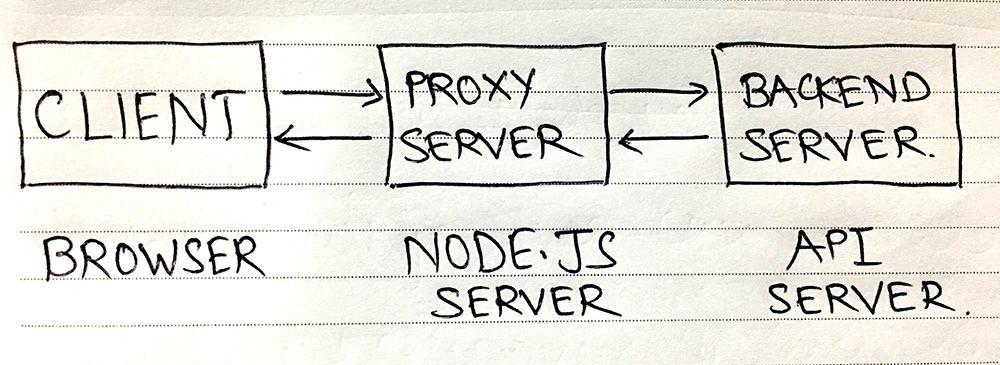
In an isomorphic app the browser does not directly deal with the API server. This is because the API server will render JSON data and browser needs to have fully formed HTML. To solve this problem a "proxy server" is introduced in between the browser and the API server.

In this case the proxy server is powered by Node.js.
Uploading a file in an isomorphic app
Recently, while working on an isomorphic app, we needed to upload a file to the API server. We couldn't directly upload from the browser because we ran into CORS issue.
One way to solve CORS issue is to add CORS support to the API sever. Since we did not have access to the API server this was not an option. It means now the file must go through the proxy server.
The problem can be seen as two separate issues.
- Uploading the file from the browser to the proxy server.
- Uploading the file from the proxy server to the API server.
Implementation
Before we start writing any code, we need to accept file on proxy server and it can be done by using Multer.
Multer is a node.js middleware for handling multipart/form-data.
We need to initialize multer with a path where it will store the uploaded files.
We can do that by adding the following code before initializing the node.js server app.
app
  .set("config", config)
  // ...other middleware
  .use(multer({ dest: "uploads/" }).any()); // add this line
Now any file uploaded to proxy server would be stored in the /uploads
directory.
Next we need a function which uploads a file from browser to the node.js server.
// code on client

function uploadImagesToNodeServer(files) {
  const formData = new FormData();
  map(files, (file, fileName) => {
    if (file && file instanceof File) {
      formData.append(fileName, file);
    }
  });

  superagent
    .post("/node_server/upload_path")
    .type("form")
    .set(headers)
    .send(data, formData)
    .then(response => {
      // handle response
    });
}
Next, let's upload the same file from the node.js server to the API server.
To do that, we need to add a callback function to our node.js server where we are accepting the POST request for step 1.
// code on node.js server
app.post("/node_server/upload_path", function (req, res) {
  uploadImagesToApiServer(req);
  // handle response
});

function uploadImagesToApiServer(req) {
  superagent
    .post("/api_server/upload_path")
    .type("form")
    .set(headers)
    .attach("image", req.files[0].path)
    .then(response => {
      // handle response
    });
}
Follow @bigbinary on X. Check out our full blog archive.